*** START OF THE PROJECT GUTENBERG EBOOK 61261 ***
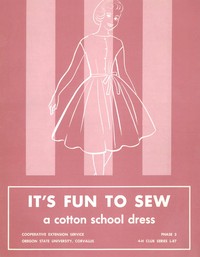
IT’S FUN TO SEW
a cotton school dress
COOPERATIVE EXTENSION SERVICE
OREGON STATE UNIVERSITY, CORVALLIS
PHASE 3
4-H CLUB SERIES L-87
It’s Fun to Sew—Cotton School Dress
Prepared by
THETA JOHNSON
Clothing Specialist, Extension Service
Utah State University
Logan, Utah
PHASE 3
Where to find page
Your guide for the project 1
Plan your project 1
Your anklets 2
Improve your grooming 2
Care of your hair 2
Patterns for you 3
Fabrics you will like 4
Before you start to sew 5
Study your pattern 5
Straighten your fabric 5
Pin and cut 6
Check your machine 6
Practice on an easy-to-make article 7
Drawstring bag 7
Swimming robe 8
Apron or scarf 9
Make clothes for school or play 9
Blouse 9
Gathered skirt 9
Gored skirt 12
School dress 12
How does your costume look to you? 12
Tips for easier sewing 13
Belt keepers 16
Darts 13
Facings 14
Fastenings 16
Gathers 11
Guide lines 13
Hems 15
Markings 13
Seams 14
Seam finishes 14
Skirt band 11
Skirt placket 10
Stay-stitching 13
Tailor’s tacks 13
Complete your record book 17
Show others what you have learned 17
Exhibits 17
Demonstrations 17
Are you ready for the next project? 17
_Read this book from cover to cover before you start your project._
Your guide for the project
This project is for you who have learned the lessons of Clothing Phases
1 and 2. You are now ready to do more advanced sewing.
Third phase clothing features clothing for school and play. It includes
points on health and good grooming for you to study and use. You will
learn to stretch the life of your clothes. Take turns leading
discussions and giving demonstrations for your club. Look at “Tips for
Easier Sewing,” page 13. They will aid you in improving your sewing.
What to study
1. Care of clothing—learn to keep your clothing in its proper place.
2. Buying anklets and how to care for them.
3. Habits to improve health and grooming.
4. Style, material, and construction of easy-to-make clothes for
school and play.
5. Taking part in special events such as judging, demonstrations, and
exhibits.
Articles to make
Make one of these articles:
Swimming robe
Scarf
Peasant apron
Draw-string bag
This will help you review what you learned in the other projects and to
get the feel of using the sewing machine.
Make one of these articles:
School dress
Skirt and blouse
Add to your 4-H record book
Your county extension agent will give you a clothing record sheet and a
sheet for your 4-H Club story for this year. Place them in front of last
years’ records. Keep your records as you go. You may record the articles
you make other than those that are required for your project, unless you
have made them for some other program or class. Keep a record of the
activities you participate in (such as tours, demonstrations, judging,
camps, and exhibits) for your permanent record.
Demonstrate to your club
Give a demonstration at one of your club meetings. Show others what you
have learned. When you show another club member how to tie a knot or sew
on a button, you are giving a “demonstration.” Things that are done or
seen are remembered longest and clearest. Work alone or with a partner.
Plan to enter a community or county demonstration contest. Ask your
leader for help on how to give a demonstration. Choose a topic you will
study in your project.
Plan your project
You will have fun making and buying clothing for school or play. Plan
this project with your leader and your mother. Remember that mother is a
partner in this project. Talk to her about what you want to make and
show her this project book. She will be glad to give you suggestions and
help you make a wise selection if she knows what you are to make.
First you will study how to buy and care for your anklets.
The first article you will make is to help you review what you learned
in your last project and to help you get the feel of the sewing machine
again. There is a wide choice—select something that you can make in a
short time. Complete this article before you start your dress or skirt
and blouse.
The second article is to be the main part of your project. Here you will
learn many new sewing methods. Select something you have not made
before. Choose something that will teach you two or three new tricks in
sewing, but be careful to avoid dresses with many details such as
collars, cuffs, and sleeves on one pattern.
Your anklets
Buying anklets
It is important that you learn to select your own clothing. Why not
start with buying your anklets? You will wear anklets for many
occasions—sports, school, and best. Select them for the occasion for
which you intend to wear them.
You will find anklets made of many fibers—cotton, rayon, nylon, wool, or
a combination of these fibers. Each of these fibers makes the anklets
feel and wear differently. Cotton anklets are soft and absorbent. They
are comfortable to wear. A good quality cotton anklet holds its shape
and wears well.
Rayon anklets are not as soft or as absorbent as cotton and may not wear
as well. Nylon anklets are made of staple yarn (silk-like) and of spun
yarn (wool-like). They give long wear but are not as comfortable as
cotton. This is because they are not as absorbent. Wool socks are
usually worn by athletes and people whose feet perspire a lot, because
they are absorbent. They will hold a lot of moisture and not feel wet.
[Illustration: {anklets}]
Read the labels
A combination of cotton and nylon makes a desirable anklet. You will
find anklets made of cotton with toes and heels reinforced with nylon
for longer wear. Blends of nylon and cotton or other fibers are also
used. Anklets are made of many new and different kinds of yarns and
knits to add patterns and stretch. New finishes are also used. Some
finishes help to hold the shape and control shrinkage. The finish may
require special care and washing.
A good anklet is closely knit, has a top which will hold its shape, and
the cuff is knitted to the foot. It comes in colors which harmonize with
your dresses or sweaters and skirts. It is “fast color” and will not
fade.
Buy the right size anklets
To be comfortable anklets should be one half inch longer than your foot.
Short socks are injurious to your feet. They do not wear as long as
properly-fitted ones.
Visit your store to study the newest types of socks for teenagers.
Care of anklets
Good care will help your anklets to last longer. Wash your socks after
each wearing. Use a mild soap or detergent and warm water. Have the
water as hot as you can comfortably hold your hands in. Rinse the socks
thoroughly in clear water and hang them by the toes to dry. White socks
may be washed with the family laundry. Always wash dark-colored ones by
hand.
Improve your grooming
Care of your hair
Study the care of your hair for your good grooming lesson. Learn to
comb, brush, shampoo, and arrange it. Invite the beautician or hair
dresser in your community to talk at a club meeting. She will be glad to
show you how to care for and style your hair. Have her show you how to
make pincurls, waves, or rolls.
[Illustration: Hairdo]
Shiny, clean-looking hair adds to your good looks. It shows the
condition of your health. Poor health, lack of rest, or poor food can
make your hair look dull. But more often, dull hair is due to lack of
care. You can add to the luster of your hair by shampooing it often.
Brushing will also add to its beauty.
Shampoo
The base of any good hair style is a good shampoo. There is no set time
for a shampoo. Shampoo your hair when it is soiled. You may want to
shampoo it every five days if your hair is oily. Every week may be often
enough if it is dry.
Use plenty of warm water and a good shampoo when you wash your hair.
Shampoos are made for oily, normal, and dry hair. Ask the beautician
which one is best for your hair. Rinse thoroughly to remove the shampoo
and to add luster to your hair.
Style
Since your hair is a frame for your face, a nice arrangement adds to
your good looks. Hair worn in a simple style is easy to manage. Good
hair styling is important. If your hair is shaped properly, it will take
the shape of the cut. Your hair styling will then be beautiful and
becoming.
Here is a trick for finding your hair style. When your hair is wet, mold
it around your face and try several parts. Try curving your part. It is
more interesting than a straight one. Always bring out your beauty
spots. If you have a beautiful hair line, display it.
Hair is styled for the individual. Try new hair styles. There are many
designed for girls your age.
Brush and comb
Brush your hair regularly with a boar-bristle brush for stimulation and
to cleanse your hair. Brush your hair carefully. Too vigorous brushing
may break the ends of your hair. The same is true of combing.
Set your hair in pincurls as often as is necessary to have your hair
look well-groomed. Comb your hair thoroughly when it is dry. Set the
waves or curls by combing through the hair slowly. This gives you
control of your hair.
Patterns for you
There are many attractive clothing patterns in our current fashion
books. Choose a style you like and feel you can make. Be sure it has
lines that are becoming to your figure and size. You may need a style
that is entirely different from the one your girl friend needs. Your
mother and leader will be glad to help you make a choice. This is
probably the first time you have used a pattern. Select one that has
only a few pieces. Avoid details such as collars, set-in sleeves, and
yokes. Select a pattern you can wear to school.
The size pattern you will need is determined by your bust measurement.
After you have selected your pattern, study the chart on the back of the
envelope. It will tell you how much fabric you need and what trimmings
to buy. Buy your pattern and fabric at the same time.
[Illustration: Measurements for fitting]
Fabrics you will like
When you select your fabric, the important thing to think about is: What
am I going to make from this fabric? When and where will I wear it? Then
choose the right design, color, and weight for your pattern.
You will want fabrics that are pretty, fun to sew, and fun to wear.
Color
What colors do you like best? Usually the colors you like are the ones
that flatter you. Hold the fabric to your face to see how you will look
in it. Does it make your hair, eyes, and skin look prettier? Will it go
with other colors of the clothing you already own? Is it a color you can
wear to school this fall? Is it a color you can find thread and trimming
to match? It is the color for you if it meets all these requirements.
Design
Study the fabrics for the size, color, and placing of the design in the
fabric. Do you want to count the number of spots on it? Is the design
too large or too small? A design that is small with interesting colors
without one part of the design being brighter than all others will make
the prettier dress or apron.
Larger, brighter, and bolder designs and colors make attractive beach
robes and bags. You will find it more difficult to make an attractive
dress or apron from plain colors, plaids, and stripes. Plain colors show
every mistake you make and plaids and stripes are difficult to match.
Border prints are used for pleated or gathered skirts. Try to match the
design at the seams.
Cotton fabrics are beautiful and there are many types of fabrics made
from cotton. Learn to recognize at least five: Percale, broadcloth, sail
cloth, cotton satin, and terry cloth. There are many interesting novelty
fabrics on the market. They have different weaves and finishes. When you
visit the store see if you can find at least three novelty
fabrics—embossed cotton, woven stripes, and a pattern weave.
[Illustration: I KNOW THESE FABRICS—DO YOU?]
New finishes
New finishes make cottons more crease resistant and easier to wash and
iron. But finishes sometimes make fabrics harder to sew and press. You
will find a finished cotton will make a crisper looking dress and will
be worth the extra work it takes to press the seams while you are making
it.
Labels
Read the information on the label on the end of the bolt. It will tell
you if the fabric is color fast, shrink resistant, crease resistant, and
either hand-or-machine washable. A good cotton fabric has all these
features.
Examine the fabric
Examine a torn end of the fabric. If the ends and designs are uneven,
look for another piece of fabric. An uneven fabric with a finish cannot
be straightened and you will not be able to cut your dress on the
straight of the grain. Crush the fabric in your hand. Select one that is
soft and difficult to wrinkle.
Tours
Plan a shopping tour with your club. Take your mother with you so she
can help you select fabrics for your projects.
Select all the fabrics you need for your project at one time. Choose
colors and fabrics that look good together. Remember that you will be
wearing your blouse with your skirt so they must look well together. The
bag or scarf you make must also harmonize with your skirt and blouse or
your other clothes.
Also think about the time you will finish your dress and select a style
and color that will be pretty then.
Shopping is fun
Before you go shopping, make a list of all the things you will need to
buy for your project—equipment, fabrics, thread. If you did not have a
tracing wheel and paper last year, you may need them this year. Make it
a habit to buy everything you need in one trip to the store.
_Fabrics for_— _Check what you need_
Dress or skirt [_]
Beach bag or robe, scarf, or apron [_]
Thread to match [_]
Fasteners, hooks and eyes [_]
snaps [_]
zipper [_]
buttons [_]
velcro [_]
Pattern, size [_]
Scissors [_]
Pins, dressmaker [_]
Measuring gauge [_]
Needles—7-9 sharp [_]
Thimble [_]
Tape measure [_]
Before you start to sew
Study your pattern
[Illustration: Studying pattern]
Study the instruction sheet carefully before you unfold your pattern.
This will help you know each piece of your pattern as you unfold it.
When unfolding it, put your initials on each piece.
You will find an arrow on each piece of the pattern that tells you how
the pattern is to be placed on your cloth. This mark is called the
“grain line.” Learn to recognize marks for fold, seamline, darts, tucks,
hems, center front and center back, buttons, and buttonholes.
When you can recognize all the marks on your pattern, trim off the edges
and pin it together. Have your leader check it for fit. She will help
you make any alterations that are necessary.
Straighten your fabric
[Illustration: Straight fabric]
Study your fabric. You will find there are threads running lengthwise
(warp threads) with other threads woven in and out of these (crosswise
or filling threads). Each of these threads should be straight, not
curved or slanted. If the end of the fabric has not been torn, pull one
thread near the end that will go all the way across the fabric. Cut
along this line.
[Illustration: Pulled thread]
[Illustration: Pulling on the bias]
Now if the ends of the fabric are not even, have your leader or mother
help you straighten the cloth by pulling on the bias, as is being done
in the picture.
When the cloth is straight, pin the edges together. Now pin the pattern
to your cloth.
Crease-resistant fabric cannot be straightened.
Pin and cut
You need a large smooth surface for pinning and cutting. A big table is
best, but you can use a clean floor.
Study your pattern layout. Fold your cloth and pin your pattern as
suggested. Place the big pattern pieces on first. See that the line that
shows the straight of the grain is placed exactly on the lengthwise
“grain” or thread of the cloth.
[Illustration: Pattern placed on fabric]
SELVAGE
STRAIGHT OF GRAIN
Measure from the selvage to this line, making sure the distance is equal
at all points. Pin at each end of mark as measurements are made. Now pin
around the edge of your pattern. Place the pins at right angles to the
edge.
Have your leader check the pattern on your cloth before you cut.
Use long sharp shears. Take long strokes to give an even edge. Cut close
to the pattern.
[Illustration: Cutting pattern]
Cut notches out, not into your seam allowance.
Before you remove the pattern, mark all darts, tucks, seams, buttons,
and buttonholes. Ask your leader to show you how to make tailor’s tacks
or how to use dressmakers’ tracing paper. Use the lightest-colored paper
that will show on your cloth. Page 13 tells you more about guide lines.
Check your machine
Before you start to sew, check the machine stitch. Your seams will not
hold if the stitch is not perfect. Try your machine stitch on a double
piece of cloth. Stitch on the bias and the straight. Does the stitch
look the same on both sides? If not, have your leader adjust the tension
while you watch to see how she does it.
For a review of what you learned about the sewing machine in your other
projects, practice sewing on a sample of your fabric until you get the
feel of the machine. When you can run the machine smoothly, make one of
the following articles for practice—scarf, draw-string bag, apron, or
swimming robe.
Cloth guide
A cloth guide on your machine will aid in making the stitching straight.
Place a strip of colored scotch tape on the machine ⅝ inch, or the width
desired, from the needle if a gauge is not available. Keep the edge of
the cloth along the inside of the tape or guide as you sew. Watch the
edge of the tape not the machine needle.
The pressure foot is a good gauge for edge stitching. It is easy to
stitch close to the edge of a hem if you let the edge of the cloth
follow the inside of the presser foot. A ⅛ inch seam can be made by
letting the edge follow the outside of the presser foot.
Practice on an easy-to-make article
Draw-string bag
[Illustration: Draw-string bag]
You may make a draw-string bag to review what you learned last year.
This may be any size. It can be used for your sewing, swimming suit, as
a hand bag, or for many other purposes.
Materials needed
_Fabric_: Percale, sail cloth, denim, terry cloth, or towel. If you use
a towel, select one approximately 14 x 23 or 18 x 28.
_Lining_: Plastic bag.
_Cording_: Cotton or nylon cording.
Make your bag
First decide how long and how wide you would like to have your bag. Make
it just large enough for the purpose you plan to use it for. Don’t make
it too large.
Follow these suggestions
1. Pull threads to straighten material and cut on these lines.
2. Cut two pieces of cloth for the bag, the size you want your bag to
be. If you have enough cloth, you may cut one piece twice as long and
eliminate the bottom seam. When a towel is used, remove the hems at both
ends.
3. Place the two pieces with right sides together or fold through the
center if one piece is used.
4. Pin or baste sides leaving the top open.
5. Measure from the top or open end of the bag ½-inch and mark with
chalk.
[Illustration: Bag pattern]
6. Take another measurement from the top, this one 4 inches down and
mark.
7. Stitch a ½-inch seam from top to first mark, and fasten or back tack
thread. Stitch below second markings. Leave the space between markings
open on both sides of bag.
8. Make a ¼-inch slash in the seam at lower markings and finish openings
with ½-inch hems.
[Illustration: Hemming the bag]
9. Make a 2-inch hem at top. Stitch through the center of the hem to
make a 1-inch wide casing and heading. If you are making a swimming bag,
why not line it with plastic. Either use a sheet or plastic bag. Make it
the same size as your bag.
At this point place the plastic under the hem. Pin or baste into
position. Turn right side out. Stitch hem. Use long stitches 6 or 8 to
an inch when sewing plastic. Small stitches will cut it.
10. Make or buy the cords for your bag. Make two cords ¾ inch wide
finished, 1 yard each in length. (See apron sashes—Phase 2.) You may buy
cotton or nylon cord. For a small bag use size 100; use size 150 for a
large bag.
11. Run cords through casing. Start each cord at opposite ends. Sew ends
of cord together or tie a knot.
[Illustration: Stitching the bag]
12. Box the bottom of the bag. Fold from corner so that side and bottom
seams are together. Mark and stitch across triangle.
Swimming robe
[Illustration: Swimming robes]
TIE or BUTTONS AND LOOP
ELASTIC or DRAW STRING
Swimming is now a popular sport in Oregon so you may want to make a
swimming robe.
You may make one like the one pictured or select an easy-to-make pattern
from your favorite pattern book. Or, adapt an overblouse pattern. Just
cut it long enough to cover your swim suit.
Here is an easy one to make. It is mostly hems.
_Fabric_: Approximately 1⅔ yards of terry cloth, sail cloth, percale,
denim, or other absorbent cotton.
How to cut
1. Fold fabric in half lengthwise.
2. Measure in from cut end 17 inches and mark.
[Illustration: Robe pattern]
FRONT
BACK
Fold
SELVAGE
3. Measure down from top 12 inches to mark arm hole. Then measure across
end 2 inches on each side of mark. Cut along these marks. This marks the
top of the side dart.
4. Mark dart. Measure 4 inches from bottom and mark. Then mark from this
point to top ends of dart. (See diagram.) Make final marks for darts
with tailor’s tacks or dressmakers’ tracing paper.
How to Make
1. Fold robe through dart and armhole. Pin and stitch shoulder seams.
Make shoulder 10½ inches long. Measure from arm hole. Make a 2-inch
seam.
2. Pin underarm dart—2 inches wide at underarm and slope to a point 4
inches from bottom. Stitch. (See darts page 13.)
3. Press a 1½-inch hem all around robe including shoulder seams and
armholes (see phase 1). To make hem turn edge back 2 inches and press,
then press ½ inch under to make 1½ inch hem.
Press, pin, and stitch hems in this order: First—front; second—neck;
third—armscye; fourth—bottom.
Stitching the hems in this order will leave the ends of the hem open so
a draw-string can be placed in the top and bottom hem. If a draw-string
is not used, the front hem may be made last.
4. Reinforce underarm with bias or hem tape.
Machine stitch around edge.
Fastenings
1. Draw-strings or ties
2. Belt
3. Velcro
4. Large buttons and loop buttonholes
5. Large snaps
6. Buttons and buttonholes
Apron or scarf
If you did not make an apron or scarf in your second year of club work,
you may choose to make one of these now. Turn back to your second-year
outline for these instructions.
[Illustration: Scarf]
Make clothes for school or play
[Illustration: Dresses]
If you have completed and judged your small article, you are ready to
start your main article. You may make a skirt and blouse, or a dress.
You talked this over with your mother and leader at your first meeting.
By now you should have your fabric and pattern and all the other things
you will need to make your chosen article.
Easy-to-make blouse
If you make a blouse, select a pattern which will be easy to make.
Choose a pattern with few pieces and without set-in sleeves or collar.
Follow the directions in your pattern for making your blouse. Learn what
all the markings mean. Stay-stitch the bias edges. Page 13 tells you how
to stay-stitch.
Select cloth for your blouse that will look good with your skirt. Be
sure the cloth is firm, pre-shrunk, and colorfast.
Gathered skirt
Select fabric that is colorful and gay for your skirt. Closely woven
cloth will be easy to sew and will hold a sharp crease.
You will need from 3 to 3½ yards of fabric for your skirt. The more
fabric you try to gather in your skirt the harder it will be to make.
For the girl of average height cut your skirt as follows:
How to cut your skirt
Cut or tear a 6½-inch strip from one side of your skirt fabric. Measure
in from the selvage edge. Use this for the skirt band and pockets. There
will be some left over.
Tear off the selvage edge from the large piece.
You may have to cut the band from the end of your fabric instead of the
side if you are tall and need the extra length.
The above method of cutting gives you one seam on the placket side.
[Illustration: Skirt pattern]
6½″
SELVAGE
BAND
POCKET
POCKET
CUT OR TEAR
SELVAGE
Sometimes the design in the fabric will be more attractive if the skirt
is cut in several lengths. When this is necessary, you will have three
or four seams in your skirt. This may make a difference in the amount of
fabric you will need, so decide how you will cut your skirt before
buying your fabric.
Make your skirt
[Illustration: Pinning the seam]
5″
1¼″ SEAM
Pin the short edges together to make the side seam. Make the seam 1¼
inches wide. It is to be used for the placket. When finished the placket
will be on the left side.
Stitch the side seam. Stitch the seam from the bottom up. At a point 5
inches from the top, turn and stitch half way across the seam. Turn both
edges of the seam toward the front section and press.
[Illustration: Stitching the seam]
5″
TRIM TO ⅝″
Trim the seams. Start at the bottom of the wide seam and trim it to ⅝
inch wide up to the placket. Do not trim above this point.
Finish the placket
1. Baste and stitch a ¼-inch hem on the back edge of the placket.
[Illustration: Hemming the back edge]
¼″ HEM
SKIRT BACK
2. Fold the front edge of the placket even with the seam line. Press.
Now fold again to make a complete hem. Baste.
[Illustration: Completing the hem]
⅝″ FOLD
SKIRT FRONT
3. Pin placket together, stitch from the top to the bottom of the
placket, turn and stitch across the end on top of first stitching. Pull
threads through and tie ends. This is a strong, easy-to-make placket.
[Illustration: Finishing the placket]
¼″ HEM
BACK
⅝″ HEM
FRONT
Hem the skirt
Skirts look best with hand-stitched hems. Make the hem before placing
the band on the skirt. Unless you have poor posture, it will hang even.
Decide how long you would like your finished skirt to be. Be careful not
to make it too short. Measure from the top edge to the length you would
like the skirt to be and press in the hem. Turn the top edge of the hem
under ½ inch. Your skirt will be prettier if you make a wide hem—3
inches or wider.
When the hem has been carefully pressed and put in place, ask your
leader to show you a hand hemming stitch.
Place gathering threads at top of skirt
Make a long stitch on your machine. Use size 50 top thread and heavy
duty for bobbin thread.
Using the guide on your machine, stitch around the top of your skirt ¼
inch from the edge. Make two more rows ¼ inch apart. You are now ready
to make your skirt band.
[Illustration: Skirt band]
Make the skirt band
1. Measure your waist. Add 2½ inches. This will give you the length
needed for your skirt band. Cut your band 6½ inches wide.
2. Press a ½-inch fold along one side of your band. From the folded edge
divide the rest into three sections. This gives three 2-inch sections.
Make the section with the ½-inch fold slightly shorter than the other
two sections. Press.
3. The section with the ½-inch fold is the front of your band. Stitch
criss-cross through the back part of the band. You can stitch straighter
if you make a guide or pattern. Cut a strip of waxed paper the length
and width of your band, 24 x 2 inches.
[Illustration: Folded waxed paper]
Fold it in six equal sections. Then fold it diagonally; then diagonally
again. Open the paper and pin it to the band and follow the creases in
the paper. This will give practice on starting and stopping the machine
and on turning corners. Tear the paper away after the stitching is
completed.
[Illustration: Stitching the seam]
4. Stitch a ½-inch seam at the ends of the band. Turn and press. Do not
sew the ½-inch fold at bottom of band into the seam.
Gather in fullness
Divide both your skirt and the skirt band into eight equal parts to help
you make the gathers even in your skirt. Do not include the placket or
1-inch overlap at the end of the band. Mark with colored threads. Mark
the skirt band so the extension or extra length will be on the back of
the placket. The front of band will be even with the front edge of the
placket.
Pin and stitch band to skirt.
Pin the pieces together, right side of skirt to right side of band.
Match dividing marks that you have made. Gently pull on the gathering
threads at the side seams, the center front and the center back. Pull
the threads until they are the same length as the band. Work with the
gathers until they are even. Baste and stitch along half-inch fold on
the skirt band.
Top stitch the band
Fold the double section of your band toward the back and baste the edge
of the band to the skirt. Baste it so the folded edge hangs just below
the stitching you just made on the front side of the band. Machine
stitch from the front side of the band. Place the stitching as near the
edge of the band as you can. Press before you stitch. Pressing will
flatten the seam and make stitching easier.
[Illustration: Finished skirt]
Press your skirt
Press your skirt. Use a dampened cheesecloth and an iron set for ironing
cotton, or use a steam iron. A skirt must be well pressed and fresh
looking to be pretty.
[Illustration: Pressed skirt]
Fastenings for the skirt
See Phase 2.
Gored skirt
You may make a four-gored skirt. If you do, you will need a pattern.
Follow the instructions on the guide sheet.
School dress
This is your first dress. Avoid set-in sleeves, collars, yokes, and
gussets. Use cotton fabrics. Study the instruction sheet in your pattern
and follow it as closely as you can. Know what every mark on the pattern
means before you start to sew. This will make it easier for you.
Pin your cloth so it is straight. Place the pattern on the “straight of
the grain” and cut with long, even strokes. Cut all the notches pointing
out.
After the cloth is cut, transfer the marks onto the fabric before
removing the pattern. Use a tracing wheel whenever possible. Use
tailor’s tacks on white or pastel colors.
Stay-stitch around all the bias and curved edges as soon as you remove
the pattern.
Remember to press as you sew. Press each seam as it is made. Pressing
makes sewing easier and improves the looks of your dress.
Hem your dress on the sewing machine if it has a full gathered skirt or
by hand on flared or straight skirts or on plain colored fabric. Use a
matching thread.
How does your costume look to you?
Once again, score your own and other club members’ work. Record your
judging on your own work in your record book. These are the points to
use in judging.
_Your score_
1. Fabric or trimming used 25 _____
Is it suitable for school or play?
Will it launder?
Will it wear well?
2. Workmanship 35 _____
Are they well made?
Are seams, hems, finishes good choices?
3. Design and color 20 _____
Are design and color attractive?
Are they right for you?
4. Condition of article 10 _____
Is it clean?
Is it well pressed?
5. Value of garment 10 _____
Is there good value for the time and money spent?
Total 100 _____
Tips for easier sewing
Trace guide lines on fabric
[Illustration: Tracing guide lines]
CLOTH
TRACING PAPER
PATTERN
It takes very little time to trace the markings for darts, seams, and
buttonholes from the pattern on the fabric if dressmakers’ carbon and a
tracing wheel are used. Trace the markings while the pattern is still
pinned to the fabric. Place the carbon waxed side to wrong side of
fabric. Both sides may be marked at the same time. Use white or
light-colored paper wherever possible. Dark colors have a tendency to
work through to the right side. Trace all pattern markings that are
essential to making the dress—darts, notches, pleats, openings, and
buttonholes. Use a ruler to trace straight lines. Make a bar at ends of
darts and tucks. Use tailor’s tacks for white or pastel fabrics.
Tailor’s tacks
[Illustration: Using tailor’s tacks]
SEAM LINE
CLIP THROUGH LOOP
SHORTEN ENDS
Use double thread of darning cotton to make tailor’s tacks.
Before taking your first stitch make a hole in the pattern with the
point of your needle. Take one stitch through pattern and double
thickness of fabric, then go over with another stitch, leaving loop and
long end.
After all marked stitches have been made, remove pattern, separate
fabric carefully, and clip threads between the two layers of fabric.
Stay-stitch the bias edges
One of the most important steps you take to keep the cloth from
stretching out of shape is to stay-stitch the edges. Stitch along the
curved and bias edges. These edges would be the neck, shoulders, waist,
armscye, and upper hip line. Stay-stitching is done on each piece
separately, through a single thickness. Stitch ½ inch from the edge of
the cloth, or ⅛ inch from seamline.
[Illustration: Stay-stitching]
OUTSIDE
CENTER BACK
OUTSIDE
CENTER FRONT
OUTSIDE
CENTER BACK
Pin and sew darts
The purpose of the dart is to shape the fabric to the body. After the
dart is properly marked, pin the two markings together and stitch from
the large end of the dart to the point. Near the point, guide the fabric
so that the stitches will be only a thread or two from the edge of the
fold. Fasten the threads by back stitching or by tying the threads.
Sew from the highest to the lowest point or from the widest to the
narrowest point, as shown by arrows on the diagrams to prevent
stretching during stitching.
[Illustration: Cutting a dart]
Make strong seams
The life of your clothing is determined by the kind and quality of its
seams. There are many types of seams and seam finishes. Each one has a
special purpose.
Plain seam
[Illustration: Plain seam]
The plain seam is the most commonly used and is the first step in making
other types of seams. The plain seam is made on the wrong side of the
garment. To make a plain seam, place the right sides of the fabric
together. Pin and sew a seam the desired width. This is usually ⅝ inch.
Follow the instructions in your pattern. Use this seam on your blouse,
skirt, and dress.
Seam finishes
Finishes are used on fabrics to prevent the edges from fraying. Use one
of the following finishes:
Pinked edges
[Illustration: Pinked edges]
Use pinking shears, if you are able to handle them. Trim off only the
very edge of your seam. Be very careful.
Edge stitching
[Illustration: Edge stitching]
After the plain seam is pressed open, machine stitch along each edge of
the seam. This is a stronger finish than the pinked edge.
Selvage
The selvage may be left as a seam finish on your skirt. Clip the selvage
every 2 or 3 inches. The clip should be no deeper than ⅛ inch. A deeper
cut will ruin the seam.
Your seams are not complete until you have pressed them. Remember,
always press a seam before joining it to another seam.
Make a fitted facing
Edges that cannot be hemmed may be finished with either bias or fitted
facings. Facings can be turned to the right or wrong side of an article.
They may be part of the decoration if used on the right side.
Fitting and stitching
1. Stay-stitch neck and shoulders.
2. Insert a basting line to mark center front and back of the facing and
blouse. Use darning cotton.
3. Sew shoulder seams of blouse and facing. Press.
4. Press a ¼ inch hem around the facing. Miter the corners and stitch.
5. Pin facing to blouse, matching shoulder seams and centers. Baste
centers of front and of back together.
6. Machine stitch
a. Stitch around the neckline, ⅝ inch seam. b. Stitch center front.
Start at point ¼ inch from center fold, stitch to point B. B. is
almost on center fold. Turn, take 3 small stitches (14-16/inch), turn
again, and stitch to point C, ¼ inch from center fold.
[Illustration: Machine-stitched blouse]
7. Cut along center fold to point B. Trim neck seam to ¼ inch and clip
seam every ½ inch.
8. Trim off corners at neck openings.
9. Turn facing and press. After facing edge is finished, tack it to the
shoulder seam of blouse.
Finishing edges
If the facing is to be used for decoration, the edge of the facing will
be stitched to the blouse or dress.
Make good hems
Straight hems
You made straight hems on your scarf and on your apron last year. Here
is a general review on how to make a hem. If you need more help, see
your last year’s bulletin.
Narrow hems
Make a fold ¼ inch wide; press. Fold this over and press again. Pin and
stitch.
Wide hems
Make ¼-inch fold along the edge. Then measure the width your hem is to
be when finished. Pin, press, and stitch.
Hems for your skirt and dress
[Illustration: Marking a hem]
1. Use a yardstick or other device to measure the distance you want your
skirt from the floor. Mark with pins, about 3 inches apart around the
skirt.
[Illustration: Folding and pinning a hem]
2. Fold along the pin-line. Pin and baste along edges of hem. Pin top of
hem to skirt.
3. Try the dress on to check length and evenness of hem.
4. Trim hem to desired width. The width of the hem is determined by
weight of fabric and fullness of skirt.
_Suggested widths_—
Moderately flared and medium weight 2 to 3 inches
Straight skirt of sheer fabric up to 4 inches
Heavy skirts of wool or cotton 2 inches or less
Flared skirts 1½ inches
Circle skirts ¼ inch or rolled
[Illustration: Hem of circular skirt]
5. In circular skirts the top of the hem is always much fuller than the
bottom of the hem. To avoid a bulge, draw this fullness to lie flat
against the skirt. Lengthen the stitch on the machine and sew around top
of the hem ¼ inch from the edge. Place another row of stitches ¼ inch
from the first row. Pin the seams and centers of panels and draw the
bobbin thread until the top part of hem is only slightly larger than the
skirt. Ease in the fullness. This step is not necessary on straight
skirts.
[Illustration: Stitching a hem]
6. Make a ¼-inch fold at the top of the hem. Machine stitch along edge.
Pin and baste in place. Hem on the machine or by hand. Use matching
thread.
Blind hemming
[Illustration: Blind hemming]
1. Fasten thread securely in the hem.
2. Take a stitch directly across from the spot where you first placed
your thread. Then take a ½-inch stitch through the top of the hem.
3. Take a stitch in the skirt in the same spot where you pulled needle
from the hem.
4. Repeat for each stitch.
This stitch hides the threads in hem and wears well.
Choose fastenings you can make yourself
What type of fasteners does your pattern suggest? You have skill enough
now to make any one of several types. Remember, choose the kind of
fasteners you can make yourself and do them the very best you can.
You have already learned the method of sewing on buttons, snaps, and
hooks and eyes. If you use any of the fasteners, sew them on securely.
See Phase 2. Make your buttonholes with a machine attachment.
A zipper may be necessary if you make a dress. Read the instructions
that come with your zipper and study your pattern for help in putting it
in your dress.
Belt keepers
You might like to put belt loops on your dress at the side seam if your
dress has a belt. Worked loops are fun to make.
[Illustration: Belt keeper]
Blanket stitch
waistline
1. Use matching double thread.
2. Hold the belt in place on dress and loop thread back and forth across
it three or four times. Take a knot stitch each time you sew into
fabric.
3. Remove the belt.
4. Work across the threads with blanket stitch. Keep stitches close
together.
Select a belt for your dress at your local store or have one made to
match your dress. You will learn to make belts when you have had more
experience in sewing.
Complete your record book
Your record book is important. Are you enjoying keeping a record of the
things you make and do? Have you recorded the articles you have made?
Have you recorded the activities you have participated in on your
permanent record? How complete is this chapter of your 4-H Club story?
Are there other things you should add—while you can still remember?
Are you keeping a scrapbook of pictures and newspaper clippings to
round-out your 4-H Club story? Are you keeping other kinds of things
such as certificates and ribbons in your scrapbook? If you belong to
more than one club are you keeping all of the things that have to do
with each project together?
Show others what you have learned
Exhibits Showing others what you have made can be fun. Plan with your
club to have a display for your mothers and fathers. Share with them the
things you have learned in making your projects. If you exhibit at the
fair your exhibit will be the main article you made. Be sure that it is
clearly labeled so that it can be returned to you.
Give a demonstration There are many opportunities to share the things
you have learned with others by giving demonstrations. Watch for these
opportunities—other than your club meetings.
Select one of the demonstrations you prepared for your club or prepare a
new one. Here are a few suggestions from which you might choose.
Gathers for a gathered skirt
Laying the pattern on the fabric
How to stay-stitch
How to thread and use a sewing machine
Make a hem for a straight skirt
Seams for dresses, blouses, and skirts
How to make a swimming bag
How to make a head scarf
Are you ready for the next project?
1. Have you kept your record book up to date and had it signed?
2. Have you studied health and good grooming?
3. Have you made two or more articles?
Keep this bulletin. You will need it for your next project. When you
have completed all the 4-H clothing projects, you will have a complete
sewing book.
THE 4-H CLUB PLEDGE
I pledge ...
my HEAD to clearer thinking
my HEART to greater loyalty
my HANDS to larger service
my HEALTH to better living
for my club, my community, and my country.
THE 4-H CLUB MOTTO
to make the best better
Cooperative Extension work in Agriculture and Home Economics, F. E.
Price, director. Oregon State University and the United States
Department of Agriculture cooperating. Printed and distributed in
furtherance of Acts of Congress of May 8 and June 30, 1914.
12M—September 1961.
Transcriber’s Notes
—Silently corrected a few typos.
—Retained publication information from the printed edition: this eBook
is public-domain in the country of publication.
—In the text versions only, text in italics is delimited by
_underscores_.
End of Project Gutenberg's It's Fun to Sew a Cotton School Dress, by Anonymous
*** END OF THE PROJECT GUTENBERG EBOOK 61261 ***
It's Fun to Sew a Cotton School Dress
Download Formats:
Excerpt
IT’S FUN TO SEW
a cotton school dress
COOPERATIVE EXTENSION SERVICE
OREGON STATE UNIVERSITY, CORVALLIS
PHASE 3
4-H CLUB SERIES L-87
Prepared by
THETA JOHNSON
Clothing Specialist, Extension Service
Utah State University
Logan, Utah
Where to find page
Your guide for the project...
Read the Full Text
— End of It's Fun to Sew a Cotton School Dress —
Book Information
- Title
- It's Fun to Sew a Cotton School Dress
- Author(s)
- Johnson, Theta
- Language
- English
- Type
- Text
- Release Date
- January 27, 2020
- Word Count
- 7,475 words
- Library of Congress Classification
- TT
- Bookshelves
- Browsing: Children & Young Adult Reading, Browsing: How To...
- Rights
- Public domain in the USA.
Related Books

The One-Eyed Fairies
by Hanley, Georgia Eldridge
English
373h 11m read
It's Fun to Sew Aprons and Skirts
by Johnson, Theta
English
128h 30m read
It's Fun to Sew with a Sewing Machine
by Struefert, Hildegarde
English
116h 54m read
The Mary Frances sewing book
by Fryer, Jane Eayre
English
754h 48m read